
Drip Irrigation
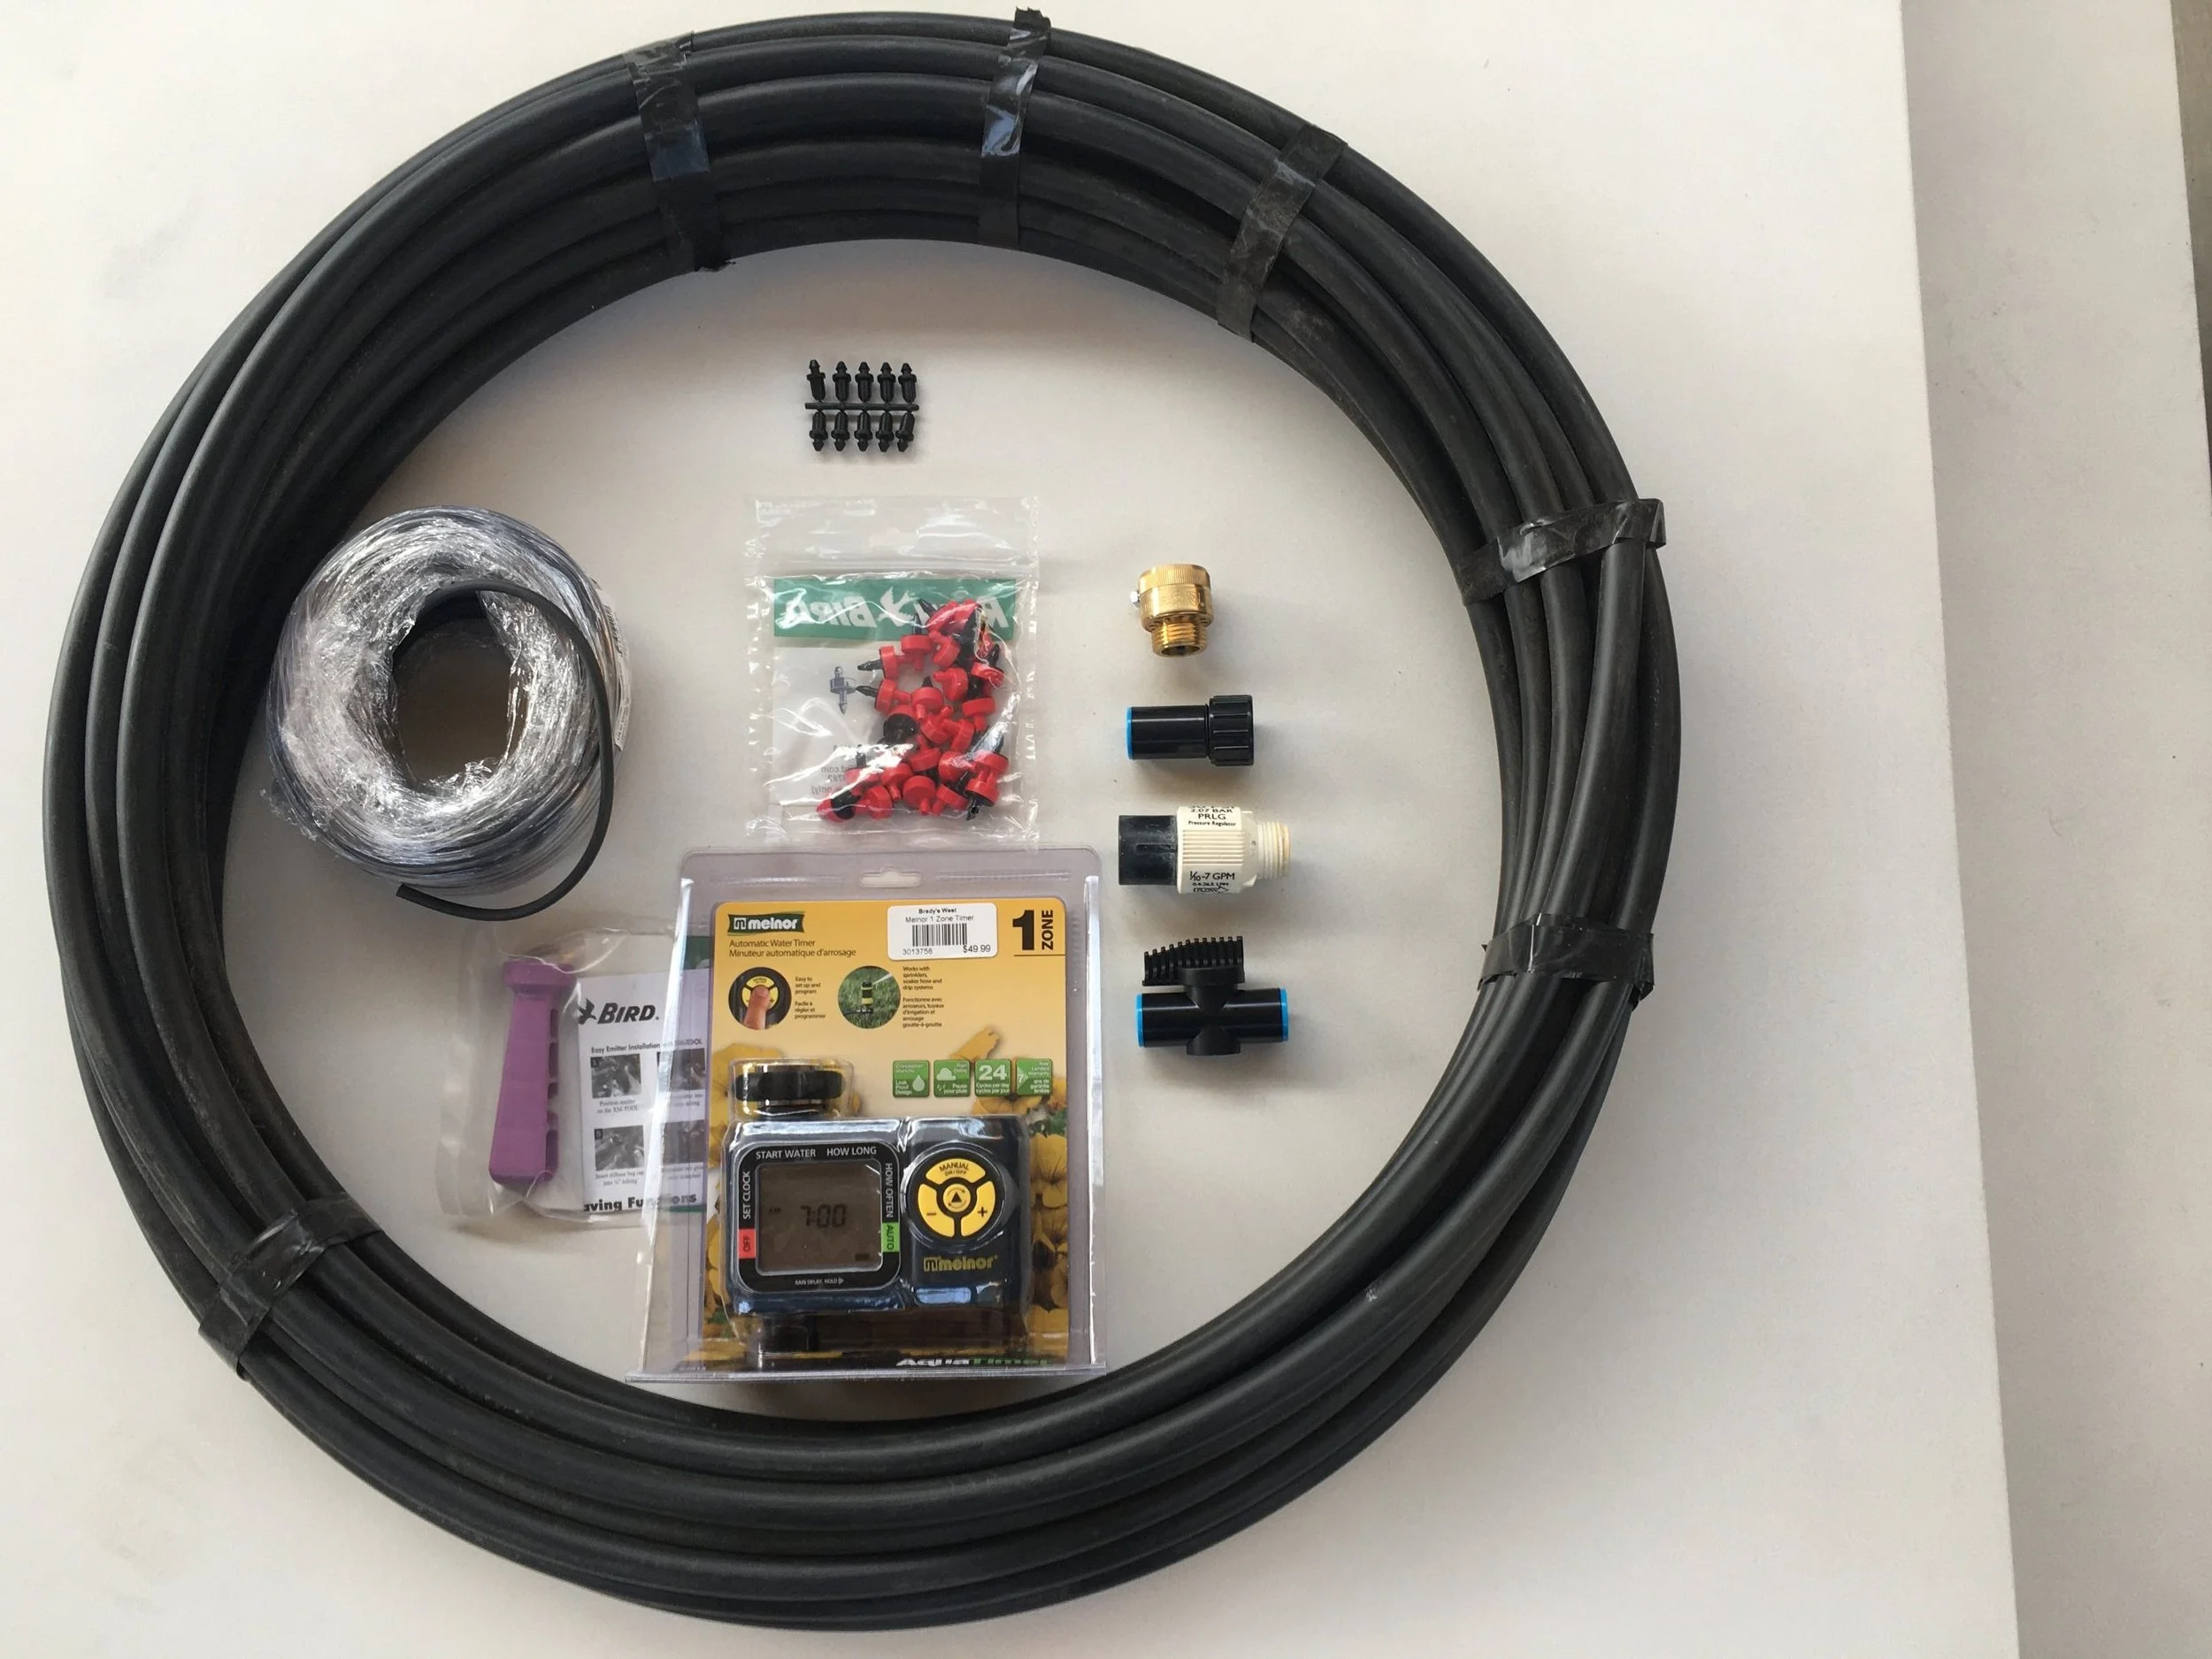
By far, the most effective and time-efficient way to water your outdoor plants is by setting up a drip irrigation system. A drip system delivers just the right amount of water to each of your plants for just right amount of time on a daily or semi-daily basis. Drip systems are very easy to set up, run, and maintain. Really, drip systems are a snap to install and set up. Below we picture and describe the different components of a basic drip irrigation system. Brady’s West offers a Drip Irrigation Kit that comes stocked with all the components you need to install a new drip system. Ask for it by name.

Drip Irrigation Supplies
We carry every item you will need to set up your drip system, including timers, tubing, and emitters. We also have a large supply of couplers, end caps, and other items needed to connect one section of the drip system to another.
Components
In a nutshell, a drip system runs from your outside hose spigot or irrigation valve directly to each your plants and involves relatively few essential components: a back flow preventer, pressure regulator, a timer, tubing, emitters and small “spaghetti” tubing running from emitters to your plants. Setting up a drip system is super simple! Believe us when we tell you, it really is that easy.

Safe Guards…
To start building a drip system, you first attach a back flow preventer to your outdoor spigot or irrigation value (the brass fitting). Next, attach a pressure regulator (the white & black fitting). The black plastic fitting shown here is an end cap compression fitting that is attached to the far end of your drip line tubing.

Timers
A timer is attached to the pressure regulator. You set it to control when water is delivered to your plants and for how long. Shown here is a timer that will run one drip zone, but we carry other timers that control up to four zones.

Tubing
Tubing, generally 1/2” to 3/4” in diameter, runs from the timer throughout the area you wish to irrigate using your drip system. The most common length of tubing for purchase is 100’, although we do carry longer lengths.

Couplers, End Caps
You can connect different lengths of tubing together using couplers—either to extend the length of the drip system or to split off a length of tubing from the main line. We also have in-line control values to control water flow in different lines. The far end of the drip line (opposite of the timer) is plugged with an end cap.

Emitters
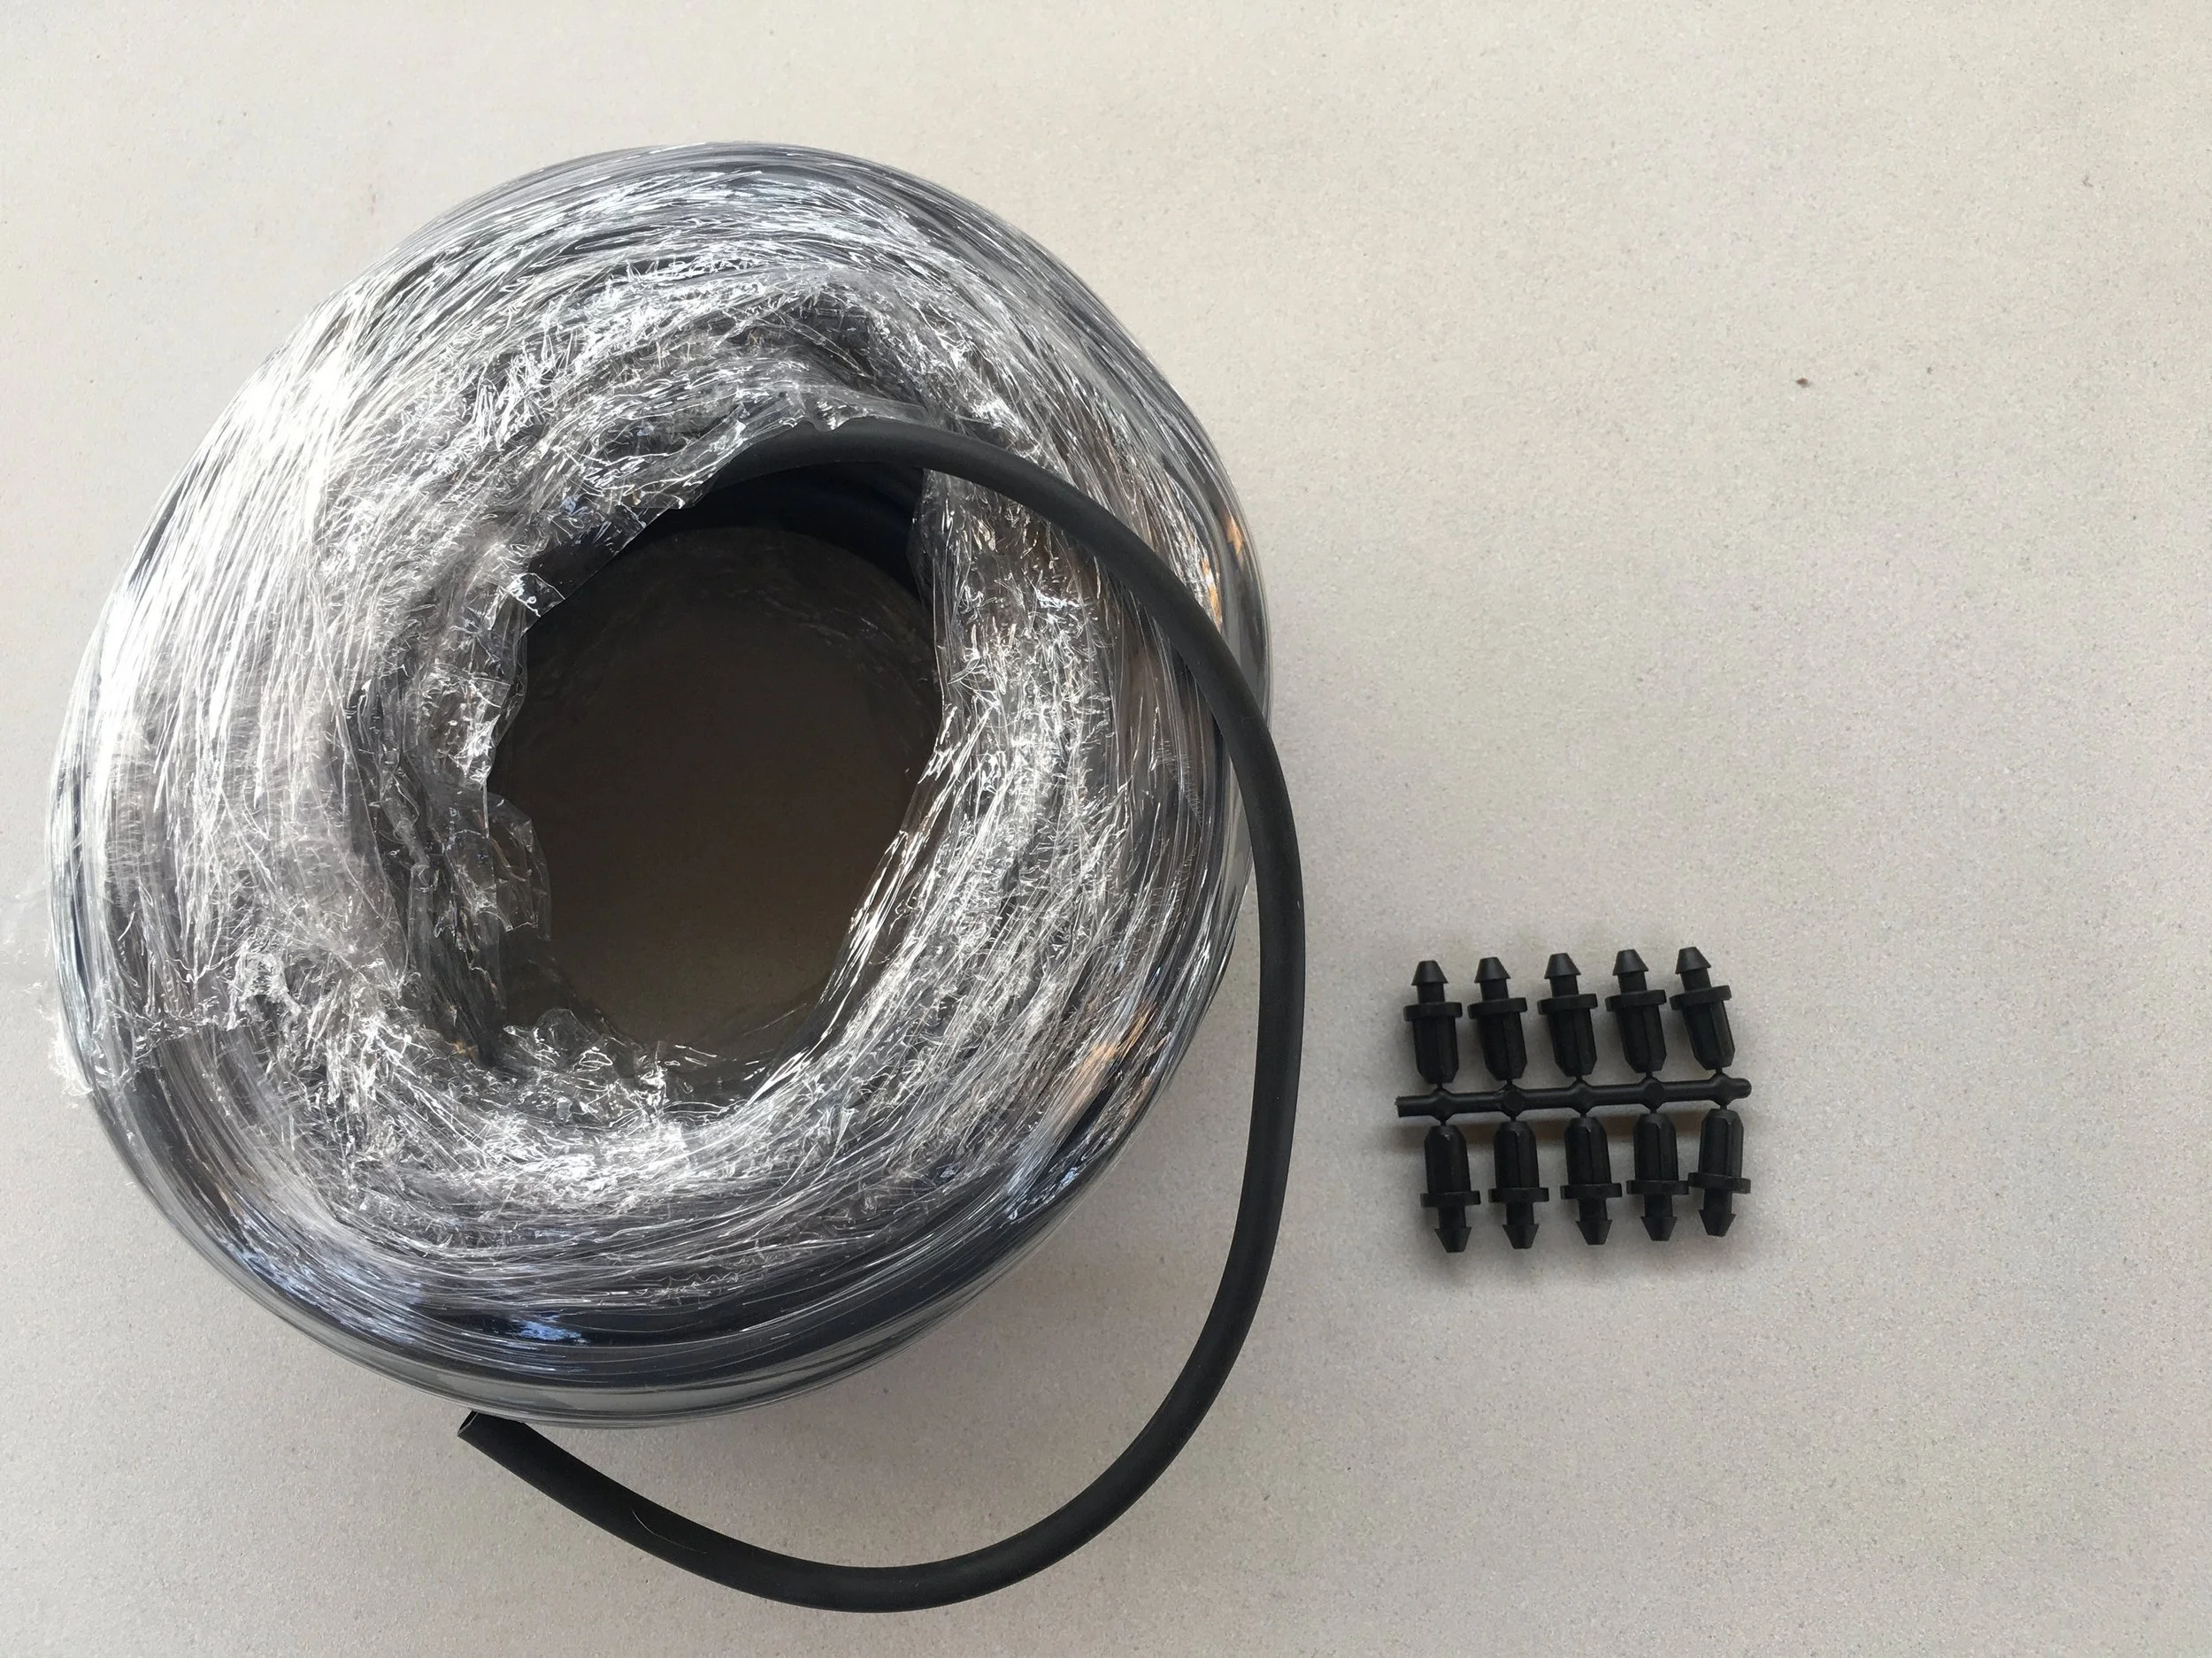
Emitters control the amount of water that will flow to your plants. Emitters are fitted onto the large tubing. Three of the most popular sized emitters permit half-gallon (blue), 1 gallon (black), or 2 gallon (red) flows per hour. Emitters can be used in different combinations to get just the right amount of water to each of your plants.

Emitter Tool
A handy-dandy tool for inserting the emitter into the tubing is the emitter tool. An emitter has two ends—one pointed for piercing the tubing and the other flat for dispensing drops of water. This flat end is inserted into a small hole at the tip of the emitter tool. Gripping the tubing in one hand and the handle of the emitter tool in the other, the pointed end is then pressed into the tubing. You will hear a “snap” when the emitter is fully inserted into the tubing.
Distribution Line 1
This small 1/4” rubber line, often called a “spaghetti line,” is cut to size and is fitted onto the flat protrusion at end of an emitter and runs directly to the plant. Also shown here is a packet of “goof plugs,” which are used to plug a hole created by removal of an emitter that you are no longer using.

Distribution Line 2
Another kind of small 1/4” rubber line is pierced with small holes every 6 inches and is used for delivering water broadly in a given area—much like a very small soaker hose. It is used in annual and perennial beds as well as raised garden beds.

Spray Stakes
Spray stakes are often used in small garden areas and beds. The stake is pushed into the ground and an adjustable sprayer at the top of the stake distributes water according to a desired angle (e.g., 45, 90, 180 degrees). The sprayer itself is attached to a distribution or spaghetti line.

Emitter on Tubing
Using the emitter tool, the emitter is pushed into the tubing, piercing the tubing with a secure fit. Note the placement of the emitter—always secure it to the side of the tubing and never to the top or bottom of it—inserting it on the side of the tubing maximizes water flow into the spaghetti line. Also shown is the spaghetti line prior to placing it on the emitter.

Almost Done…
The spaghetti line fits snugly over the flat end of the emitter. Fitting the spaghetti line onto the emitter is simple and does not require any special tool—just a little pressure and some jiggling back and forth does the trick!

Out in the Yard…
This photograph shows what the drip system will look like out in the yard. Here you can see the tubing (1/2”), emitters, and spaghetti line. Emitters should be spaced at least 6” from each other. Some people prefer to bury as much of the drip system as possible whereas others feel comfortable leaving the entire drip system visible on the ground.